Casella UK
Wolseley Rd, Kempston,Bedford MK42 7JY
+44(0)1234844100
info@casellasolutions.com
High chemical concentrations can pose an immediate (acute) risk to life but repeated exposure to relatively low concentrations can lead to long term (chronic) illnesses, cancers and even hearing loss in the case of ototoxic chemicals such as nitriles, metals and their compounds and solvents.
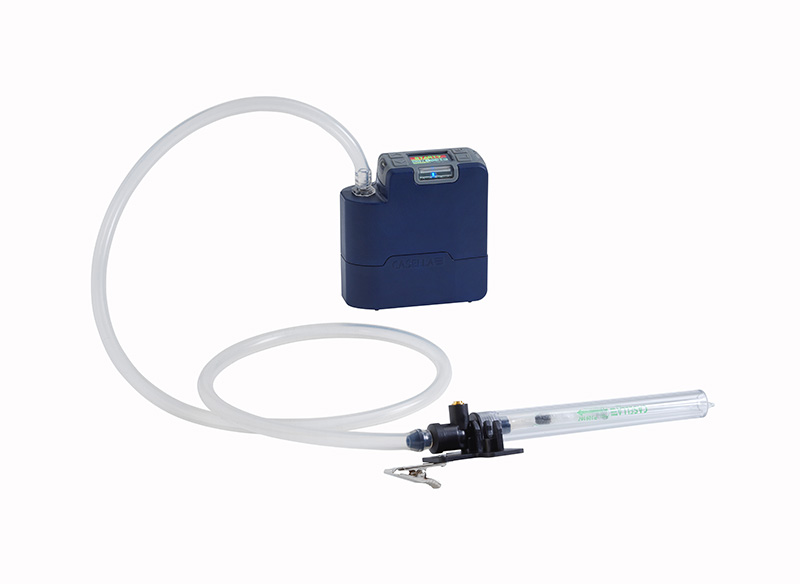
In the particular case of solvents, personal monitoring using a low flow pump and an adsorbent tube is a preferred solution, whereby a time weighted average concentration may be determined by drawing a known volume of air through the tube at constant flow over an entire shift. The tube is then desorbed and subsequently analysed by a competent laboratory.
It is advisable to use a dedicated low flow, rather than a medium flow pump with a low flow adaptor, because the former is smaller and lighter and often contributes to a successful sample. The pump should ideally meet the latest version of ISO13137:2013 Workplace atmospheres -- Pumps for personal sampling of chemical and biological agents -- Requirements and test methods because compliant flow control and error detection are vital to obtaining a valid sample. These features tend to be far superior on modern pumps that meet this relatively new standard, which is currently itself under review being over 5 years old.
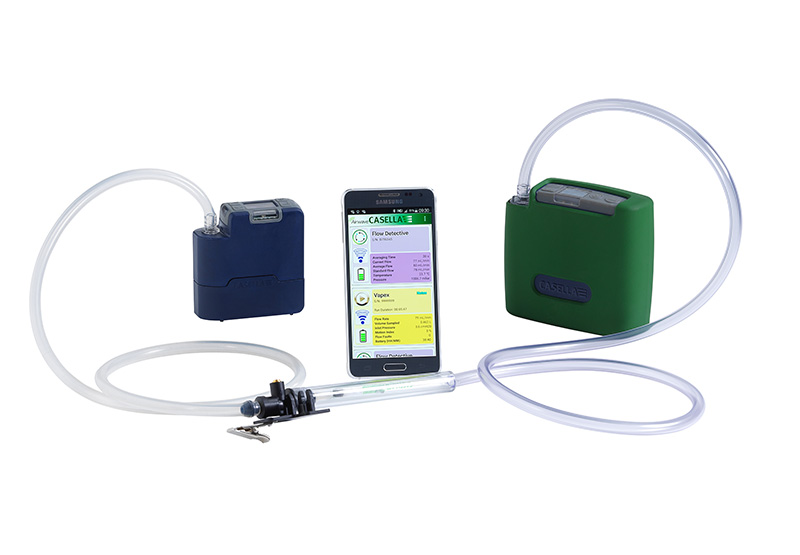
Modern pumps also have motion detection (for checking wearer compliance) and Bluetooth connectivity, which when used with a proprietary Smartphone app, can be used to remotely start and stop the pump and to check the progress of the sample without having to disturb the worker.
You should also check that the pump’s intrinsic safety (IS) approvals e.g. ATEX, IECEx, FM etc meet your facilities’ requirements and if in any doubt, consult the responsible site supervisor. Finally check that the pump has been serviced in accordance with manufacturer’s recommendations (normally after a few thousand hours use) and if using a digital flow calibrator, check that it is also within its calibration date. If using a rotameter ensure it has a low enough range to ensure that it has sufficient precision.
1. Consult the relevant analytical method and determine the appropriate sorbent tube to use (for the chemical being sampled) along with the required flow rate.
2. Gather the pump, tube holder, flexible tubing (of the correct internal diameter), flow calibration device and adsorbent tubes and check they are from the same batch and ‘in date’.
3. Switch the pump on and check that the pump’s remaining battery life is sufficient for the proposed sample period. Modern pumps have superior battery status indication and the battery themselves do not suffer memory effects and have low self-discharge. If necessary, charge the pump in accordance with the manufacturer’s instructions.
4. Connect the tube holder to the inlet on the pump using flexible tubing such as Tygon.
5. Just before sampling, use a scorer/breaker tool to uniformly break the ends of a sorbent tube to a 2 mm diameter or half the diameter of the tube body and insert in the holder.
6. Ensure that the arrow on the tube, which indicates the correct air flow direction, is pointing to the pump. If no arrow is present, the smallest (backup) section should be nearest to the pump.
7. Fit the calibration device to the tube holder again using flexible tubing. Run the pump for a few minutes to stabilize, then set the flow rate (as indicated by the laboratory method) in an uncontaminated, non-hazardous area e.g. an office.
8. After calibration stop the pump, remove the tube from the tube holder set aside for a post sample calibration check. Insert a new tube from the same batch and ensure the correct low direction as described previously.
9. Attach the tube holder to the wearer with the open end placed in the breathing zone i.e. a 30 cm radius centered on the nose & mouth. Keep the tube in a vertical position during sampling to prevent the possibility of channeling that can otherwise lead to under-sampling.
10. Place the pump in a pocket or on a belt and route the tubing so that it won’t get snagged or impede the worker’s movements.
11. Run the pump and check the sample train for leaks.
12. If possible, periodically check the progress of the sample – use a Smartphone app if available and of course the phone itself should be intrinsically safe if used in a hazardous area.
13. At the end of the sample time, stop the pump and return to the office/uncontaminated area. Remove the exposed tube and seal with the caps provided and label.
14. Check the flow calibration using the previously used ‘control’ tube and the set flow should not differ by more than 5% otherwise the sample will have to be repeated with a new tube.
15. Ship the sample along with any supporting data to a laboratory as soon as possible; avoid excessive heat and rough handling. Also send unused field blanks for analysis. These blanks are handled in the same way as an exposed tube but have not had sample air drawn through them.
Casella UK
Wolseley Rd, Kempston,