But before I put the strimmer away, I thought I’d look in more detail about how to make the measurements that feature in the handbook which, as a reminder, stated that the typical weighted vibration (ah) for this, rather budget model was 2.5 m/s2 with an uncertainty of 1.5 m/s2. Of course, that data would have been provided by a notified body; a test laboratory ISO17025 [3] accredited to make such measurements and indeed they get a name check in the CE/UKCA declaration, but I thought how hard can it be to make a measurement? ‘Not very’ as I subsequently found out.
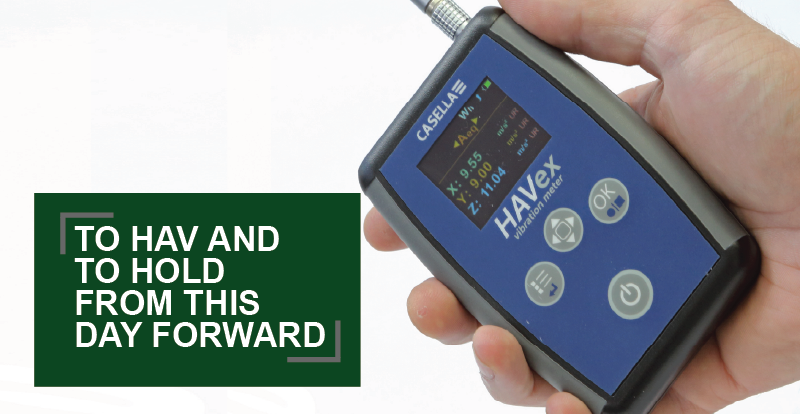
To HAV and to hold from this day forward?
The weather has most definitely turned autumnal, holidays are now just a photographic memory on the authors’ phone, I’ve just celebrated my 41st Wedding Anniversary, my 3rd Grandchild is due any day soon and thoughts are obviously turning to Christmas; there, I said it! Maybe that’s an opportunity to buy myself a new strimmer to replace the one which featured in two previous articles on hand arm vibration (HAV) [1] [2]?
Try before you buy!
A quick phonecall to Casella resulted in the receipt of a demonstration version of their HAVex vibration meter and they also pointed me to an independent review [4] which I found very helpful. A quick look on the back of the instrument confirmed it was to the correct standard, BS EN ISO 8041 [5] which means that it has the correct frequency weighting (Wh) according to the widely accepted measurement standard BS EN ISO 5439 [6]. You can’t just use any old vibration meter! I noticed that the calibration certificate was way out of date but that’s OK for a piece of demo kit but for a ‘proper measurement’ it should of course be in-date and ideally the instrument should be calibrated annually for compliance purposes.
As a reminder, the vibration magnitude (ah) is ascertained using the formula ah = √ (a2hwx + a2hwy+ a2hwz), where ahwx ahwy and ahwz are the root-mean-square acceleration magnitude measured in the three orthogonal directions x, y and z at the vibrating surface in contact with the hand and frequency-weighted using the weighting Wh.
So, I’d already heeded my own advice from the last article [2] and purchased the HSE’s Guidance on the Regulations [7] and referring to appendix 2, I quickly set about fixing the sensor or as the previously mentioned review put it, “the magic happens in the Hand Arm Accelerometer–a small metal box that connects to the main body with a roughly 5-foot cable. That’s the piece you need to fasten to your equipment”.
It is preferable to measure all three orthogonal axes x, y & z at the same time and fortunately, the HAVex has such a tri-axial accelerometer, screwed to a v-block fitting which is ideally suited to curved surfaces such as tool handles.
Figure 1 shows the axes in detail (on another tool) while you can see in figure 2, that fitting was achieved on my strimmer’s handle using some heavy-duty cable ties although jubilee (pipe) clips would achieve an even more rigid fit and as such is a better practice.

It is preferable to measure all three orthogonal axes x, y & z at the same time and fortunately, the HAVex has such a tri-axial accelerometer, screwed to a v-block fitting which is ideally suited to curved surfaces such as tool handles. Figure 1 shows the axes in detail (on another tool) while you can see in figure 2, that fitting was achieved on my strimmer’s handle using some heavy-duty cable ties although jubilee (pipe) clips would achieve an even more rigid fit and as such is a better practice.
It is vitally important that the accelerometer is rigidly mounted to the handle of the tool at each hand position, two in this case. The best place to install it is as close to the middle of where you grip the tool but if that’s not realistic, as close as you can. On tools that require two hands as in this case, you need to take separate measurements at both points and average them for a single value measurement of the tool.
Viewing Vibration
Once you’ve attached the accelerometer cable to the body of the instrument using the Lemo connector and given the HAVex time to ‘warm up’, it immediately displays current vibration on each axis although it’s advisable to give the meter 30 minutes to settle into the environmental conditions for the most accurate readings.
It’s powered by a rechargeable NiMH battery and the 2100 mAh battery lasts up to 10 hours of continuous use.
Depending on the level of vibration you expect, you need to select an appropriate measurement scale. Low reads from 0.050–200.0 m/s² and high reads 0.500–2000.0 m/s² with both under and over range indicators. When you’re ready to start recording, simply hit the “OK” button. Hit it again when you’re finished. You can store up to 992 measurements in the flash memory.
To get the best results, record for at least 30 seconds if you are doing a static test but longer measurement runs can be achieved to get a more representative exposure of actual use. Pressing the scroll button (button top centre) lets you cycle through several modes.
- Arms: Wh weighted, root mean square acceleration
- Aeq: Time-averaged and Wh weighted acceleration
- Amax: Maximum Arms level
- Peak: Highest Wh weighted instantaneous level
- Vector: Vector Sum (tri-axial) calculation from each of the orthogonal Aeq values
- Exposure: Point system feedback for UK guidelines
Exposure Points
As the review points out “One of the most helpful features on this tool, particularly for our European friends, is the Exposure Points mode. This gives you feedback for vibration action values at 5, 15, 30, and 60-minute intervals. Anything under the Action Level of 2.50 m/s² is green. Yellow means you’re between 2.50 and 5.00 m/s². Red means you’re over the 5.00 m/s² Limit Level.
While we don’t use that scale in the US (yet), there’s some value in paying attention to it as a general guideline. More than a few new protocols and regulations have drifted here from our European neighbors”. Appendix 1 of the Guidance explains the use of exposure points in more detail.
You can view recorded data on the screen or upload it into the Casella’s Vibdata software with a free version that lets you simply read the data and a more comprehensive (chargeable) Pro version that gives you the following added features:
- Exposure Calculator
- Merge/Combine Results
- Add Images
- Trend Analysis
- Add new records
The results for this static trial were indicative of the results shown in the handbook but that wasn’t really the objective. The HAVex turned out to be an intuitive, simple to use instrument which can easily be used to verify manufacturers data, periodically measure tools for wear and get a more accurate real-world exposure measure during actual use. I need to ship the demo unit back in time for an upcoming exhibition, so perhaps I should ask Santa for one (as well as a new strimmer) for me to HAV and to hold?
References
1. What is HAVS, and why is it important? (casellasolutions.com)
2. How do you measure HAV? (casellasolutions.com)
3. ISO/IEC 17025:2017 General requirements for the competence of testing and calibration laboratories
4. Casella HAVex Vibration Meter M104006 Review - Pro Tool Reviews
5. BS EN ISO 8041-1:2017 Human response to vibration — Measuring instrumentation — Part 1: General purpose vibration meters
6. BS EN ISO 5349-1:2001 Mechanical vibration. Measurement and evaluation of human exposure to hand-transmitted vibration General requirements
7. The Control of Vibration at Work Regulations 2005: Guidance on Regulations. HSE publication L140, second edition 2019
TSI Incorporated
500 Cardigan Road
Shoreview, Minnesota, 55126 USA
Copyright © 2022 TSI. All Rights Reserved
Casella UK
Wolseley Rd, Kempston,Bedford MK42 7JY
+44(0)1234844100
info@casellasolutions.com